A table can help clarify a list |
| Christmas Masses at St John's Church | ||
| Tue 24 Dec | 6:00pm | Vigil Christmas Eve |
| Tue 24 Dec | 10:00pm | Vigil Christmas Eve |
| Wed 25 Dec | 8:30am | Christmas Day |
| Wed 25 Dec | 10:00am | Christmas Day |
| Wed 25 Dec | 12:00 Noon | Christmas Day |
1. With your article open in the editor - place the cursor where you would like to create a table.
| 2. Select the table button | (in the toolbar just above) |
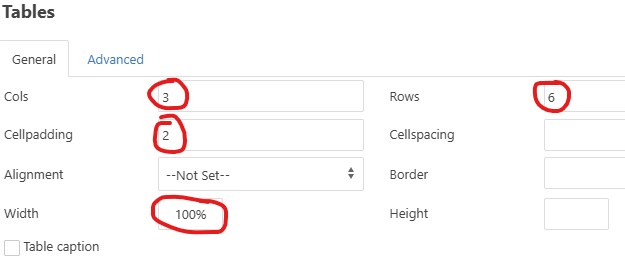
3. You now need to decide the number of columns and rows you need. In the example above that would be 3 Cols and 6 Rows.
While you are at it, you could set the Cellpadding to 2 (this gives a little space around the text in each cell) and if you want the table to stretch to full width set that 100%
| 4. Then click the | button |
Adding Borders to the cells
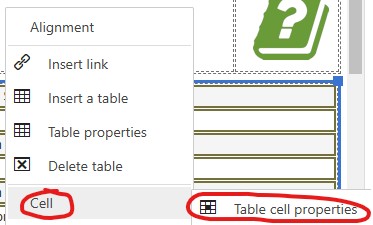
5. Your table will look much clearer if you add borders to all of the cells. Right click anywhere over your table and hovering over Cell select Table cell properties
6. This dialog box will open. Scroll down and you will need to:
- Select Update all cells in table
- Select the Border checkbox
- Decide the width of your border lines e.g. 2
- Select the Style e.g. solid
- And a colour (you might find a matching colour on the Template tab)
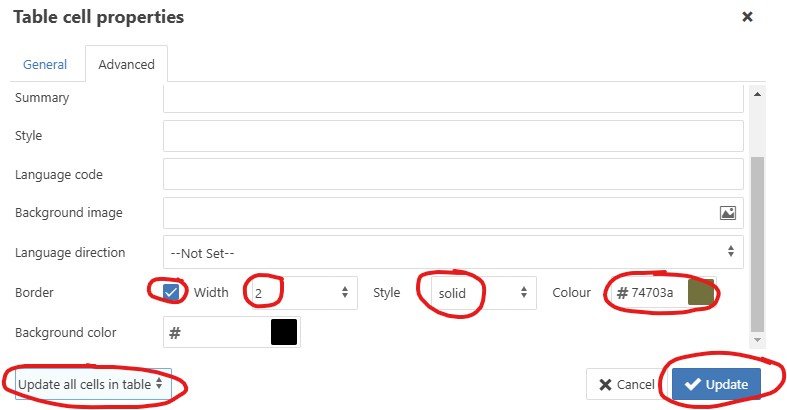
7. Then click the Update button
Merging Cells
You might have noticed in the example above the first row spans one cell across the three columns.
Here's how to do this:
| 8. Click and drag across all the cells in the first row so they highlight |
| 9. Select the Merge Table Cells | button |
Add the text
10. You are now ready to start typing the text in each cell.
Tip: If you want to break into two line within a cell use Shift + Enter to create a line break (and avoid a new paragraph)
Shading alternative Rows
Shading each alternative row can help clarify the information in your table like the example above.
Here's how to do this:
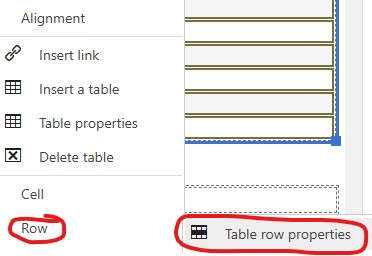
11. Right click anywhere over your table, hover over Row and select Table row properties
12. This dialog box will open. Scroll down and you will need to:
- Select the Advanced tab
- Then Update odd rows in table
- Select a Background color
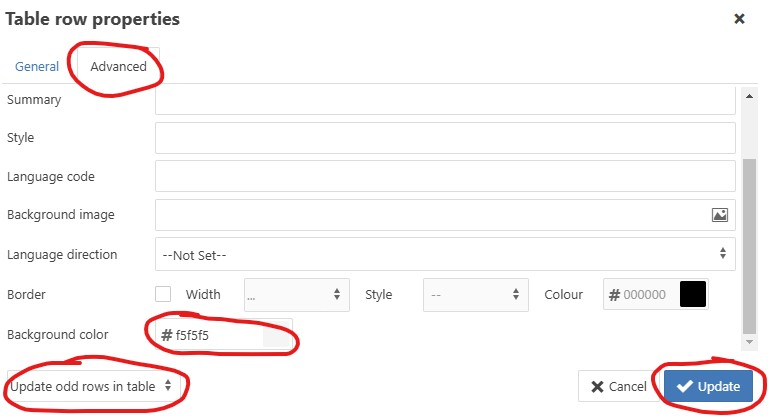
13. Then click the Update button